 Heaven-on-High
Introduction
Heaven-on-High is an ever-changing dungeon whose architecture is never quite the same each time players enter the tower. All players will begin at level 61, and only by fighting the enemies within will they be able to gain the strength and experience needed to explore its heights.
Requirements
Quest: Knocking on Heaven's Door
Guide for the base of deep dungeon: Play guide (Lodestone)
Preperation
To help you complete the HoH increase your aetherpool to the maximum and use the following consumables :
Recommended youtube channel for solo clear videos from floors 1 to 100 : Angelusdemonus (EN)
Summary
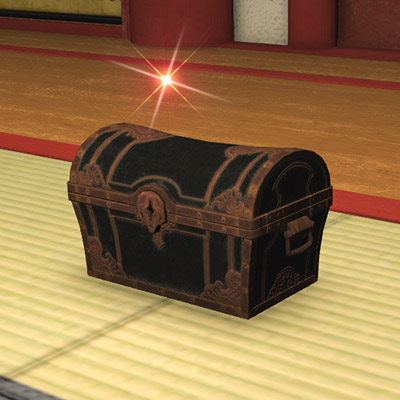
Chests

Gold Coffers
Gold Coffers may yield pomanders. The coffer will remain even if these items already exceed the inventory limit.
Warning : This chest can transform into Mimic, the higher you go up the floors, the more chances that they will transform into Mimics will be increased.

Silver Coffers
Silver Coffers may strengthen aetherpool arms and armor or contain magicite. However, there is a possibility that the strengthening effects will not take hold even if players' weapons and gear are not at maximum level.
Opening these coffers will have no effect if the players' weapons and gear are at their maximum level of strength. Weapons and armor are strengthened separately, and one or the other will be randomly selected for each player.
Warning : This chest can explode, which causes enormous damage, the more you go up in the floors, the more the chances that they explode will be increased. This can be useful to the solo tank when they want to finish off a monster faster.
Bronze Coffers
Bronze Coffers may yield normal items such as potions or empyrean potsherds, which can be exchanged for special items with the Confederate custodian in Crick in the Ruby Sea (X:21.2 Y:9.3).
This is the only way to get Empyrean Potion through the exchange of empyrean potsherds, try to get as many as possible, you will need a lot for your solo try in the upper floors.
Floor Effects
| Floor Effects | Description |
|---|---|
| Auto-heal Penalty | HP regeneration for all part members is disabled. |
| Blindness | Accuracy of all party members is reduced. |
| Damage Penalty | Damage dealt by all party members is reduced. |
| Gloom | Enemy movement speed is increased. Enemies also deal more damage while taking less. |
| Haste | Weaponskill recast time, spell recast time, and auto-attack delay for all party members are reduced. |
| HP/MP Boost | Maximum HP and MP of all party members are increased. |
| HP Penalty | Maximum HP of all party members is reduced. |
| Inability | Use of abilities is prohibited for all party members. |
| Item Penalty | Use of items (including pomanders) is prohibited for all party members. |
| Knockback Penalty | Knockback and draw-in effects for both enemies and allies are disabled. |
| Sprint Penalty | Use of the action Sprint is prohibited for all party members. |
| Sprint | Movement speed increases for you and your teammates. |
| Unmagicked | Unable to use magicite. |
Traps
Impeding
Silences and applies pacification to anybody in the radius (including mobs). Both are removable with Esuna, and Echo Drops can remove the silence.
Otter
Turns the person who stepped on it into a otter for 20 seconds, who has reduced HP and cannot use any skills/items. You should never run into a room when fighting.
Land Mine
Deals 80% current health damage to anything in the vicinity. Can be used to clear out a lot of mobs quickly.
Luring
Summons 3 random monsters from the room (including patrols). All will attack the person who hit the trap, it will take a few seconds after being summoned to move.
Above floor 90+, as a party, stay away from the person who will advance first. If he triggers the trap, do not attack the monsters, let the person die in a corner to reset the aggro of the monsters that appear and resuscitate the person.
Enfeebling
Applies a 1 minute debuff to the person who stepped on it, increasing damage taken by 20% and reducing damage dealt by 20%. Not removable with Esuna.
Traps will spawn randomly in any floor except the starting room. To minimize the chance of stepping on a trap, hug the walls and trace paths that your teammates take.
Mimics
When opening a chest, it can turn into Mimic. These monsters automatically attack with high damage, and can apply a nasty 10 minute debuff Accursed Pox on one random player on their aggro list. This debuff is only curable with the Pomander of Purity, and prevents HP from regenerating (even out of combat) while reducing damage dealt by roughly 10%.
Avoid opening chests unnecessarily when you don't need them. Mimics appear from the following specific chests :
- Floor 1 - 30 : Bronze Coffers
- Floor 31 - 60 : Silver Coffers
- Floor 61+ : Gold Coffers
Their casting of Accursed Pox can be interrupted using spells that apply silence.
Pomanders
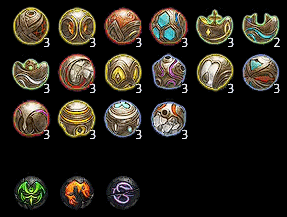
Accumulate as much Pomander as possible at the start of your ascent, you need to be at the maximum Pomander in each category when you start floors 71+.
Keep as many Safety, Sight, Strength, Steel, Affluence, Flight, Concealment, Petrification, and Magicite as possible for floors 91+.
Use Pomander mainly when you have too much of it and can't pick up the one you find.
| Pomanders | Description |
|---|---|
| Pomander of Safety | Removes all traps from the current floor. |
| Pomander of Sight | Reveals the current floor's map and the location of all hidden traps. |
| Pomander of Strength | Increases damage dealt and HP recovered via healing magic by 30%. |
| Pomander of Steel | Decreases damage received by 40%. |
| Pomander of Affluence | Increases the number of treasure coffers on the next floor. |
| Pomander of Flight | Decreases the number of enemies on the next floor. |
| Pomander of Alteration | Changes the enemy occupying a random room on the next floor into a mimic or a mandragora. |
| Pomander of Purity | Removes the Pox status. |
| Pomander of Fortune | Increases the chance enemies on the current floor will drop treasure coffers. |
| Pomander of Witching | Transforms all targets within range into a frog, imp, or chicken. |
| Pomander of Serenity | Removes all enchantments from the current floor. |
| Pomander of Frailty | Weakens all enemies on current floor. |
| Pomander of Concealment | Renders party invisible to enemies and traps. |
| Pomander of Intuition | Reveals the current floor's hidden traps. |
| Pomander of Raising | Instantly raises the first party member to be KOd. |
| Pomander of Petrification | Turns all enemies on current floor to stone. |
| Crag Magicite | Creates a simulacrum of Titan, Lord of Crags, based off the wielder's memories of past encounters with the primal. |
| Inferno Magicite | Creates a simulacrum of Ifrit, Lord of the Inferno, based off the wielder's memories of past encounters with the primal. |
| Vortex Magicite | Creates a simulacrum of Garuda, Lady of the Vortex, based off the wielder's memories of past encounters with the primal. |
| Elder Magicite | Creates a simulacrum of Odin based off the wielder's memories of past encounters with the elder primal. |
Information
Many mobs have a targeted skill that is often a cleave - “double autoattacks”. Each monster will have a danger level assigned party or solo as well as the type of aggro.
Difficulty level
-
Easy
One of the easiest monsters to face in a large number of classes. It is recommended to attack there as a priority in order to access the next floor.
-
Caution
These monsters should be attacked with caution, some can do heavy damage to you.
-
Scary
These monsters alone can wipe your party, be very, very careful.
-
Impossible
Do not touch it, unless you are using Pomander of Witching.
Aggro type
-
Sight
Monsters that aggro on sight can only aggro people who pass in their field of vision, therefore in a small cone in front of them. It will sometimes be necessary to wait until they turn around to be able to pass behind them.
-
Sound
Monsters that aggro by sound will attack you if you run near them. If you don't move, or if you activate the walk mode, you can easily dodge them, as long as you don't touch them because it remains sensitive to the touch. You can even use your skills next to them without them attacking you. Be careful not to trigger a trap nearby, they will hear it and attack you.
-
Proximity
Monsters that aggro by proximity are difficult to avoid if you enter their detection range. This varies depending on the monster, for example, Mimics have a very large one.

Hey! If you see me next to a monster's name, that means you can view the full list of spells it uses if you click on the table row.
Floor 1 - 10
| Monster | Description | Min - Max Floor | Solo Difficulty | Party Difficulty | Aggro Type | Patrol |
|---|---|---|---|---|---|---|
| Heavenly Mutsu | 1 - 3 | Easy | Easy | Sight | No | |
| Heavenly Naked Yumemi | 1 - 3 | Easy | Easy | Sight | No | |
| Heavenly Bombfish | 1 - 4 | Easy | Easy | Sight | No | |
| Heavenly Shark | Can inflict significant damage. | 1 - 4 | Caution | Easy | Sight | Yes |
| Heavenly Onryo | 3 - 5 | Easy | Easy | Proximity | No | |
| Heavenly Coralshell | Untelegraphed frontal AoE that inflicts Sleep (see spells). | 4 - 5 | Easy | Easy | Sight | No |
| Heavenly Gyuki | 5 - 7 | Easy | Easy | Sight | No | |
| Heavenly Amikiri | 5 - 9 | Easy | Easy | Sight | Yes | |
| Heavenly Uwabami | 6 - 9 | Easy | Easy | Sight | No | |
| Heavenly Kraken | 6 - 9 | Easy | Easy | Proximity | No | |
| Heavenly Yumemi | 7 - 9 | Easy | Easy | Sight | Yes | |
| Heavenly Matamata | 8 - 9 | Easy | Easy | Sight | No | |
| Heavenly Ango | 8 - 9 | Easy | Easy | Sight | No |
Boss Floor 10 : Mojabune
Walks to the center and uses a global knockback (cannot be Surecasted), followed by a half-roomwide AoE.
Spells :
Concussive Oscillation : Large circle AoE telegraphed on a random target.
Overtow : Deluge of water from the middle of the arena which projects all the players on the bottom of the arena.
Amorphous Applause : Very large semi-circle AoE telegraphed over half of the arena. This attack comes directly after the Overtow.
Floor 11 - 20
| Monster | Description | Min - Max Floor | Solo Difficulty | Party Difficulty | Aggro Type | Patrol |
|---|---|---|---|---|---|---|
| Heavenly Shiomushi | 11 - 14 | Easy | Easy | Sight | No | |
| Heavenly Shizuku | 11 - 13 | Easy | Easy | Proximity | No | |
| Heavenly Namazu | 11 - 13 | Easy | Easy | Sight | Yes | |
| Heavenly Korpokkur | 11 - 13 | Easy | Easy | Sight | No | |
| Heavenly Hakagiri | 13 - 15 | Easy | Easy | Sight | No | |
| Heavenly Unkiu | 14 - 16 | Easy | Easy | Sight | No | |
| Heavenly Hand | Has a room-wide enrage AoE. | 14 - 16 | Caution | Caution | Sight | Yes |
| Heavenly Otokage | 15 - 17 | Easy | Easy | Sight | No | |
| Heavenly Apa | 15 - 17 | Easy | Easy | Proximity | No | |
| Heavenly Tatsunoko | 16 - 19 | Easy | Easy | Sight | No | |
| Heavenly Shioname | 17 - 19 | Easy | Easy | Sight | No | |
| Heavenly Aomino | 17 - 19 | Easy | Easy | Sight | Yes | |
| Heavenly Amagoi | 17 - 19 | Easy | Easy | Sight | No |
Boss Floor 20 : Beccho
Will attempt to do a fear mechanic, while summoning butterflies (Chokeshin) around the edges of the arena. They explode (untelegraphed), and the fear will make you walk into the walls, so make sure to avoid it.
Spells :
Proboscis : Tank buster.
Psycho Squama : Very large telegraphed cone AoE on the front of the boss that inflicts Confusion on players hit.
Neuro Squama : Gaze spell on the boss that inflicts Terror on those who look at it.
Add Floor 20 : Chokeshin
Spells :
Fragility : Sacrifices itself to create an explosion in a circle untelegraphed around the caster that inflicts Paralysis.
Floor 21 - 30
| Monster | Description | Min - Max Floor | Solo Difficulty | Party Difficulty | Aggro Type | Patrol |
|---|---|---|---|---|---|---|
| Heavenly Dhruva | 21 - 25 | Easy | Easy | Proximity | No | |
| Heavenly Katasharin | 21 - 24 | Easy | Easy | Sight | Yes | |
| Heavenly Onibi | 21 - 23 | Easy | Easy | Proximity | No | |
| Heavenly Halgai | 21 - 23 | Easy | Easy | Sight | No | |
| Heavenly Sai Taisui | 22 - 24 | Easy | Easy | Sight | No | |
| Heavenly Menreiki | 24 - 27 | Easy | Easy | Sight | Yes | |
| Heavenly Hatamoto | Uses Midare Setsugekka, and it hurts. Tenka Goken is also a untelegraphed cone knockback. | 24 - 27 | Caution | Easy | Proximity | No |
| Heavenly Tenaga | 25 - 27 | Easy | Easy | Sight | No | |
| Heavenly Yuki | 26 - 29 | Easy | Easy | Proximity | Yes | |
| Heavenly Keukegen | 26 - 29 | Easy | Easy | Sight | No | |
| Heavenly Koja | 27 - 29 | Easy | Easy | Sound | No | |
| Heavenly Wanyudo | 26 - 29 | Easy | Easy | Sight | Yes | |
| Heavenly Tengu | 27 - 29 | Easy | Easy | Sight | No |
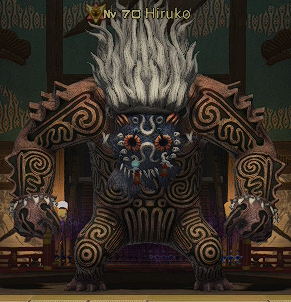
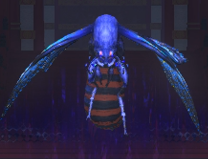
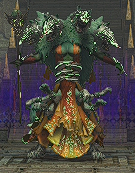
Boss Floor 30 : Hiruko
Summons clouds that explode after a while, and casts a proximity AoE under him. Run to the side and don't get clipped by multiple clouds. If you get knocked up into a cloud, the cloud will disappear. Also has a half-room AOE, so save a gap closer or don't kite too far.
Spells :
Lightning Strike : Long column AoE telegraphed in front of the boss that deals heavy damage.
Cloud Call : Causes clouds (Raiun) to appear all over the arena.
Shiko : Proximity AoE under the boss who will throw everyone present in the air. Take advantage of this attack to be thrown on a cloud and make it disappear once it is hit.
Supercell : Semicircle AoE telegraphed in front of the boss across the entire arena that deals high damage.
Add Floor 30 : Raiun
Spells :
Lightning Bolt : Circle AoE untelegraphed around the caster that deals high damage.
Floor 31 - 40
| Monster | Description | Min - Max Floor | Solo Difficulty | Party Difficulty | Aggro Type | Patrol |
|---|---|---|---|---|---|---|
| Heavenly Onmitsu | Has a self destruct used below 10%. | 31 - 39 | Caution | Caution | Sight | Yes |
| Heavenly Hanya | 31 - 35 | Easy | Easy | Sight | No | |
| Heavenly Hornbill | 31 - 35 | Easy | Easy | Sight | No | |
| Heavenly Gedan | 31 - 35 | Easy | Easy | Sight | No | |
| Heavenly Harakiri | Has a self destruct used below 20%. | 32 - 35 | Easy | Easy | Sight | No |
| Heavenly Vanara | Has a frontal AOE cleave with no telegraph or cast bar. | 34 - 36 | Caution | Easy | Sight | Yes |
| Heavenly Moko | Cleaves every other auto attack. | 35 - 39 | Easy | Easy | Sight | No |
| Heavenly Mokin | 36 - 39 | Easy | Easy | Sight | No | |
| Heavenly Shishi | 36 - 39 | Easy | Easy | Sight | No | |
| Heavenly Kiyofusa | Has a stack marker. (light damage) | 36 - 39 | Easy | Easy | Sight | No |
| Heavenly Dogu | 36 - 39 | Easy | Easy | Sight | Yes | |
| Heavenly Ashigaru | 36 - 39 | Easy | Easy | Sight | No |
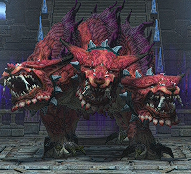
Boss Floor 40 : Bhima
Attempts to use a knockback as Whirlwind spawn on the edge and he walks to the center. The knockback pushes everyone away from him - don't get pushed into one of those Whirlwind. Surecast/Arms length don't work.
Spells :
Tornado : Circle AoE untelegraphed on the main target.
Ancient Aero II : Circle AoE telegraphed on a random target.
Ancient Aero III : Knocks people who take damage to the edge of the arena. It detonates the Whirlwind at the same time.
Ancient Aero : Large column AoE in front of the boss on a random target.
Add Floor 40 : Whirlwind
Spells :
Windage : Circle AoE telegraphed that explodes very quickly.
Floor 41 - 50
| Monster | Description | Min - Max Floor | Solo Difficulty | Party Difficulty | Aggro Type | Patrol |
|---|---|---|---|---|---|---|
| Heavenly Dhara | 41 - 45 | Easy | Easy | Sight | No | |
| Heavenly Ganseki | 41 - 45 | Easy | Easy | Proximity | No | |
| Heavenly Saikoro | 41 - 49 | Easy | Easy | Sight | No | |
| Heavenly Sekizo | Stone mob | 41 - 49 | Easy | Easy | Sight | Yes |
| Heavenly Sekizo | Green mob | 41 - 49 | Easy | Easy | Sight | Yes |
| Heavenly Kuro-usagi | 41 - 45 | Easy | Easy | Sight | Yes | |
| Heavenly Sekiban | Have an enrage, kill it quickly. | 44 - 47 | Caution | Caution | Sight | No |
| Heavenly Aka-ishi | 46 - 49 | Easy | Easy | Sight | No | |
| Heavenly Mizumimizu | Have an enrages that will draw all nearby people onto them and kill them for sure. (30 secs) | 46 - 49 | Caution | Caution | Sound | Yes |
| Heavenly Iseki | Green mob | 46 - 49 | Easy | Easy | Sight | No |
| Heavenly Monoiwa | 46 - 49 | Easy | Easy | Sight | No | |
| Heavenly Iseki | Metallic mob | 46 - 49 | Easy | Easy | Sight | No |
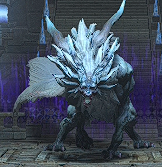
Boss Floor 50 : Gozu
Has a untelegraphed, no cast bar swipe and line attack. He also has a fear mechanic, and summons pulsing bombs (Gloom) on the floor alongside a proximity AoE. When solo, the fear will lead to a 100% death.
Spells :
Rusting Claws : Raise your right paw to prepare an untelegraphed forward cone attack that deals massive damage.
Words of Woe : Cast a black ball in front of his mouth to launch an AoE in a straight line in front of him that deals heavy damage.
Eye of the Fire : Gaze spell, inflicts Terror on those who look at it.
The Spin : Proximity AoE under the boss, move away from him.
Add Floor 50 : Gloom
Spells :
Void Spark : Large circle AoE telegraphed around the caster.
Floor 51 - 60
| Monster | Description | Min - Max Floor | Solo Difficulty | Party Difficulty | Aggro Type | Patrol |
|---|---|---|---|---|---|---|
| Heavenly Kamakiri | 51 - 55 | Easy | Easy | Sound | No | |
| Heavenly Kamanari | 51 - 55 | Easy | Easy | Sound | No | |
| Heavenly Naga | Has a cone aoe fear that applies stone curse, which is a petrify that can lead to an instant death. Also has an enrage that deals 25K AoE damage, with a very fast cast time. It is stunnable. | 51 - 55 | Scary | Scary | Sight | Yes |
| Heavenly Tokagekiba | 51 - 55 | Easy | Easy | Sight | No | |
| Heavenly Kongorei | Have a self-destruct enrage that's instant. When solo, avoid running into rooms with one of these on you, in the event you get Ottered. | 51 - 55 | Caution | Caution | Sight | No |
| Heavenly Tetsu-kyojin | 54 - 57 | Easy | Easy | Sight | Yes | |
| Heavenly Tesso | 54 - 57 | Easy | Easy | Sight | No | |
| Heavenly Dokyu | 56 - 59 | Easy | Easy | Sight | Yes | |
| Heavenly Karakuri | 56 - 59 | Easy | Easy | Sight | No | |
| Heavenly Maruishi | Spams big line aoes, these hit for 40K+, one shotting DPS/healers. | 55 - 59 | Caution | Caution | Proximity | No |
| Heavenly Shabti | 56 - 59 | Easy | Easy | Sight | No | |
| Heavenly Rachimonai | Does random AOE damage across rooms (instant, untelegraphed). If there are some in the rooms near you, make sure you kill them first or avoid them - they can do a lot of unexpected damage. | 56 - 59 | Caution | Caution | Sight | No |
| Heavenly Gowan | 56 - 59 | Easy | Easy | Sight | No |
Boss Floor 60 : Suikazura
Telegraphs everywhere. Lines, doughnuts, circles. Just dodge them and you'll be fine. Every now and then he will cast a global AoE, followed by line AoE coming out of every staff.
Spells :
Firewalker : Cone AoE in front of the boss that deals high physical damage.
Fire II : Circle AoE telegraphed on a random target that deals high damage.
Topple : Circle AoE telegraphed around the boss.
Ancient Flare : Raid buster that deals damage to all enemies in the arena.
Add Floor 60 : Accursed Cane
Spells :
Infinite Anguish : Large donuts AoE telegraphed around the caster.
Searing Chain : Line AoE telegraphed in front of the caster to a random target that deals heavy damage and Bleeding.
Floor 61 - 70
Starting on this set, mimics can no longer be stunned.
Avoid the Onryo as well as the Shitaibana, as they have very potent DOTs. You do not need any buffs for the boss fight, as the boss’s damage output is not that high.
The early floors are very rough due to the large amount of Onryos and Wakakusa. Make sure you have plenty of room to kite. Pop a strength or steel to make life easy if you have to. From floor 64 and beyond, there will be a lot of easier mobs to pick off, so it shouldn’t be as bad. Ideally, you should clear floor 70 with a perfect set of items.
| Monster | Description | Min - Max Floor | Solo Difficulty | Party Difficulty | Aggro Type | Patrol |
|---|---|---|---|---|---|---|
| Heavenly Onryo | The cone attack will have a high chance of killing you if you pick it up. | 61 - 65 | Caution | Easy | Proximity | No |
| Heavenly Mannenso | 61 - 65 | Easy | Easy | Sight | No | |
| Heavenly Wakakusa | Don't underestimate the stacking poison - it lasts for 30 secs. | 61 - 65 | Caution | Easy | Sound | No |
| Heavenly Jubokko | 61 - 65 | Easy | Easy | Sight | Yes | |
| Heavenly Iwamushi | 64 - 67 | Easy | Easy | Sight | No | |
| Heavenly Jellyfish | 64 - 67 | Easy | Easy | Sight | No | |
| Heavenly Morbol | 65 - 69 | Easy | Easy | Sight | No | |
| Heavenly Kosodegai | 65 - 69 | Easy | Easy | Sight | No | |
| Heavenly Doguzeri | 64 - 67 | Easy | Easy | Sound | No | |
| Heavenly Chizakura | 65 - 69 | Easy | Easy | Sight | Yes | |
| Heavenly Hashiri-dokoro | Has a donuts AoE, fear, and AoE damage that kills you if you get feared. | 65 - 69 | Caution | Caution | Sight | No |
| Heavenly Penghou | 65 - 69 | Easy | Easy | Sight | No | |
| Heavenly Shitaibana | Has a cleave and poison. The poison can be avoided by staying at long range. | 65 - 69 | Caution | Easy | Sight | No |
Boss Floor 70 : Kenko
Every once in a while, creates a puddle on a player with the Innerspace ability. This puddle applies the Minimum debuff, which you need to dodge the line targeted AOE Hound out of hell. If you do not have the minimum debuff, you will get one shot. Make sure to also get out of the the minimum debuff after the Devour skill goes off.
Also the tank must be careful of the non-telegraphed frontal cleave, which is the first skill he will use in the rotation.
The boss also gains a Damage Up buff if it devours someone, while healing for a decent amount.
Spells :
Predator Claws : Tank buster and inflicts a Flesh Wound.
Slabber : Large circle AoE telegraphed on a random target that deals high damage.
Innerspace : Targets a random enemy and drops an AoE that applies the Minimum effect to those in it.
Ululation : Raid buster, damage is greatly increased to enemies under the Minimum effect. The boss can also prepare the targeting of the next attack at this time.
Hound out of Hell : Prepares to charge the targeted enemy early, applies a Stun when they charge.
Devour : Arrives directly after Hound out of Hell and will kill the target if not under the Minimum effect.
Floor 71 - 80
The mobs here start to really hurt. Kite well, keep sustain potions up all the time, and be very way of patrols. Look for easy mobs to pick off. Mimics can do really poorly with crits, but they’re still possible without poms if you have room to kite.
Be wary of mobs that have large conal attacks (Hyoga, Mammoth, Yeti). Because of these, you cannot kite too far.
On the later floors, there will be a couple mobs that you need to prepare to LoS for (Yak, Yuki). For the Griffin, make sure you can hide.
Do not hesitate to use a petrification to bypass an ugly floor (no abilities, gloom, etc). Make sure you check as many gold chests as you can before you do so, to get rid of possible mimics.
| Monster | Description | Min - Max Floor | Solo Difficulty | Party Difficulty | Aggro Type | Patrol |
|---|---|---|---|---|---|---|
| Heavenly Ichijama | Avoid staying in AoE and interrupt them when you can. | 71 - 75 | Caution | Caution | Proximity | No |
| Heavenly Shikubi | 71 - 75 | Easy | Easy | Sight | No | |
| Heavenly Hyoga | Has a large roomwide frontal cone that one shots, and a fear. | 71 - 75 | Caution | Caution | Sight | Yes |
| Heavenly Noyagi | 71 - 75 | Easy | Easy | Sight | No | |
| Heavenly Okami | They have a double auto with a nasty DOT. | 71 - 75 | Caution | Easy | Sight | No |
| Heavenly Yuki-tokage | 73 - 77 | Easy | Easy | Sight | No | |
| Heavenly Hyozan | 74 - 77 | Easy | Easy | Sight | Yes | |
| Heavenly Mammoth | Deals half-roomwide damage when not in combat (around 7K). After pulling people in with Wooly Inspiration, uses an instant conal attack that one-shots anyone in front of it. | 74 - 77 | Caution | Caution | Sight | No |
| Heavenly Tofu | 75 - 79 | Caution | Easy | Sight | No | |
| Heavenly Yuki-otoko | Has a really big, but stunnable, AoE that can be LoSed (Northerlies). Also has a quick (and large) conal attack, so don't kite too far. | 76 - 79 | Caution | Caution | Sight | No |
| Heavenly Shiro-jishi | Large stunnable AoE and double autoattack. | 76 - 79 | Caution | Easy | Sight | Yes |
| Heavenly Jujishi | Has a fast-casting enrage "Winds of Winter" that is likely to kill everyone it hits (it also applies a DOT and gives the griffin a haste buff). This can be avoided through Line of Sight, so fight it behind a corner and seek cover when it goes off. The enrage happens after 30 seconds. It is stunnable. | 76 - 79 | Scary | Scary | Proximity | No |
| Heavenly Yak | They only autoattack for a while, and then after 30 seconds they will enrage, pulling everyone in (and applying a heavy) and then stomping on them for lethal damage. | 76 - 79 | Caution | Easy | Sight | No |
Boss Floor 80 : Kajigakaka
Summons balls of ice that explode, untelegraphed, after a period of time. An icicle will also appear, shooting through the middle of the room. Any balls hit by the icicle will explode, and any balls hit by exploding balls will also explode (domino effect). When in doubt, stay away from the ice balls as the icicle resolves. Make sure you are also away from the remaining balls when the Lunar Cry skill finishes, or you will receive deep freeze and die if solo. After Lunar Cry, he will randomly jumps to targets and bites them for 8K damage (One shot if frozen).
Spells :
Heavensward Howl : Wide cone AoE telegraphed in front of the boss on the main target.
Ecliptic Bite : Jumps on a random target and inflicts physical damage.
Howling Moon : Spawns balls of ice on the arena and a spike of ice. The ice spike will do a telegraphed straight line AoE on one of the balls of ice, causing them all to explode one after the other. Do not stand near ice cubes.
Lunar Cry : Raid buster and also explode the last unexploded balls of ice.
Floor 81 - 90
Be very mindful of the Garula patrols on early floors, which have huge AoE that one-shot. Make sure you have room to fight them (if you’re in a hallway in between two dangerous rooms, you may be forced into a mob or trap, which will spell death within seconds.
Alone, everything here hits insanely hard. Avoid anything with double-autoattacks unless you’re a tank or have steel. Take advantage of telegraphs to DPS.
When pulling mobs with a charge attack (Garula, Matanga, Rakshasa), you can line-of-sight the charge, such that the mob won’t be in position to auto attack you directly after (the charge will still do damage). This is very important, because if the charge crits, it can do 90% of your HP, and you’re in no shape to take an auto after that.
| Monster | Description | Min - Max Floor | Solo Difficulty | Party Difficulty | Aggro Type | Patrol |
|---|---|---|---|---|---|---|
| Heavenly Rowan | Buffs itself, and then pounds its chest for roomwide AoE. Be careful as these AoE will remove your concealment. | 81 - 85 | Caution | Caution | Sight | No |
| Heavenly Mukai-inu | 81 - 85 | Scary | Scary | Proximity | No | |
| Heavenly Matanga | 81 - 85 | Easy | Easy | Sight | No | |
| Heavenly Garula | Has a huge conal AoE, then circular AoE, and then raidwide damage. Be very careful about where you fight these, as you need space to run to avoid its large AoE attacks. If healer is somehow dead, this can cause issues if you don’t have any heals. You can avoid earthquake damage through line of sight. | 81 - 85 | Caution | Scary | Sight | Yes |
| Heavenly Gozu | Untelegraphed attack on a random player, which is a huge cone. Also has a fear. | 82 - 87 | Caution | Caution | Sight | No |
| Heavenly Ryukotsu | 82 - 87 | Easy | Easy | Sight | No | |
| Heavenly Shinzei | Double auto attack that does heavy damage and applies a DOT. Targeted Thunder II that does AoE damage 4x on a target and applies another DOT. | 84 - 87 | Scary | Easy | Sight | Yes |
| Heavenly Ryujin | Uses Elbow Drop, an incredibly deceiving attack with no telegraph that attacks directly behind where the monster is facing. | 84 - 87 | Caution | Caution | Sight | No |
| Heavenly Rakshasa | Charges, buffs itself with damage up, and has an untelegraphed frontal swipe. | 86 - 89 | Caution | Caution | Sight | Yes |
| Heavenly Araragi | Has a AoE stack Poison. | 86 - 89 | Caution | Caution | Sight | No |
| Heavenly Enko | They have an enrage buff that increases their damage. | 86 - 89 | Caution | Caution | Sight | No |
| Heavenly Hitotsume | Watch out for the 100 tonze swing and glower. | 85 - 89 | Caution | Caution | Sight | No |
| Heavenly Koki | A few telegraphs, and then a roomwide unavoidable Vulnerability Up stack and light damage. | 86 - 89 | Easy | Easy | Proximity | No |
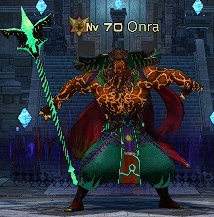
Boss Floor 90 : Onra
After around 85%, the skill he use will:
Ancient Quaga: Roomwide 50% max HP damage. Exploding rocks appear all around room, applying heavy/10K damage if you step too close as well as Heavy.
There will always be a safespot in the north-eastern corner. As such, stand slightly north of 3’o’clock and let him auto you once after dropping casting Ancient Quaga. He will cast Meteor Impact - stay closeby for a bit as you bait the line, and move up near 12’o’clock to get away from the Meteor damage. After the meteor resolves, you can move back to 3’o’clock in preparation for the next rotation.
You can also one shot the boss with Odin if you have one.
Spells :
Burning Rave : Circle AoE telegraphed on a random target that deals heavy damage.
Knuckle Press : Circle AoE telegraphed around the boss dealing high damage.
Aura Cannon : Large column AoE telegraphed on the main target that deals high damage.
Ancient Quaga : Unavoidable raid buster that inflicts significant damage to everyone in the arena.
Meteor Impact : Leaves a proximity AoE at the location where he cast the spell.
Floor 91 - 99
If you have kept Safety/Sights well, use them in separate ways one per floor, this will make 6 floors where you can feel a little quieter (use them as late as possible to have absolutely some on the last floors for example 94-99). However, adapt to the situation, if a floor, you feel it is better to use a petrification, then use a Safety/Sights with it.
Save as much Serenity as possible for the later floors when you need to use a Magicite or Petrification, it would be annoying to have Item Penalty preventing you from clearing a desired floor.
If you have affluence, pop it as soon as possible.
Be very careful of patrols and pick off mobs in areas where you know you will have a place to hide from patrols.
Steel req: For DPS (in general). Tanks can get away with mostly anything.
91-93 : White mage Nuppeppos are the easiest target to pick off. However, be careful of patrols coming around. There are walls on the side of rooms that are safe from patrols.
94-96 : Kubinashi, avoid when possible solo, and pick off as soon as possible in a party. Kyozo are the easy target on this set, as well as White Mages Nuppeppo on floor 94.
97-99 : Kyozo and Shabti are the easiest. But if you did well, you have Magicites or Petrifications ready.
99 : is guaranteed to have gloom + two other effects. Be prepared with a serenity.
| Monster | Description | Min - Max Floor | Solo Difficulty | Party Difficulty | Aggro Type | Patrol |
|---|---|---|---|---|---|---|
| Heavenly Nuppeppo | War - Some "tankbusters". Knocks back 3 times - stand against a wall to avoid flying around a room. | 91 - 94 | Scary | Caution | Sight | No |
| Heavenly Gozu | On pull, charges to target. Watch out for the Swing and the untelegraphed 32 Swipe. | 91 - 95 | Caution | Caution | Sight | Yes |
| Heavenly Nuppeppo | Whm | 91 - 94 | Easy | Easy | Sight | No |
| Heavenly Nuppeppo | Mnk - Buffs itself with haste, and eventually does a double-auto that applies a DOT. If solo, use bind/sleep on the monk (if applicable) to wait out the haste buff (it won't use the double auto unless it has haste). Alternatively, arm's length will cancel out the haste buff. | 91 - 94 | Caution | Easy | Sight | No |
| Heavenly Mifune | The targeted line AoE deals very high damage to non-tanks. Hide behind a wall to stop his attack. | 91 - 99 | Caution | Easy | Proximity | No |
| Heavenly Jaki | Charybdis targeted aoe. Can be LoSed and stunned. | 93 - 99 | Caution | Easy | Sight | No |
| Heavenly Kubinashi | Has a lifesteal effect that it uses shortly after entering combat, as well as an instant frontal cleave. Constantly gains a stacking damage up buff. Upon reaching 3 stacks, uses Black Nebula, a roomwide enrage one shot. | 94 - 99 | Caution | Easy | Sight | Yes |
| Heavenly Jinba | Has a permanently stacking damage buff, and a massive AoE that is placed on a random player. Also has a fear. | 94 - 99 | Scary | Scary | Sight | No |
| Heavenly Kyozo | Buffs itself with Vulnerability Down. | 95 - 99 | Easy | Easy | Sight | No |
| Heavenly Shabti | 96 - 99 | Easy | Easy | Sight | No | |
| Heavenly Kuro-kishi | 96 - 99 | Caution | Easy | Proximity | No | |
| Heavenly Tenma | Has a untelegraphed line AoE used on a random player, as well as a huge AoE. | 96 - 99 | Caution | Easy | Sight | Yes |
| Heavenly Zenki | 97 - 99 | Caution | Easy | Sight | No | |
| Heavenly Dodo | 99 - 99 | Easy | Easy | Sight | Yes |
Congratulations if you made it to the end!